Thursday, April 11, 2013

Its that time of the year...

Its that time of the year that us pasty, white girls love and hate.  The weather has gone from snowing last week to the upper 80s this week!  What's a girl to do when the weather changes that suddenly?  No time to catch rays outside or at the tanning bed...although, since a pre-cancerous spot on my skin a few years ago, I avoid both any more.  That's a whole 'nother post though. 

So, self tanner it is!  Most of you that know me well, know that I'm an obsessed self tanner because I can't stand being whiter than snow.  The year I knew I would no longer be a frequent visitor at the tanning bed from March to September, I knew I had to find something to tan this skin! 

I have a love, hate relationship with self tanners over all.  I think its hard to find that perfect one.  They either stink, are hard to apply, look to orange, streak or something.  My go to for the last few years has been too drastic for most.  Prepare yourself...this is what inhabits my basement lol


Its a spray gun that has an air compressor.  While I love the color it gives me, its nearly impossible to do on your own so my darling husband gets to be the tanning technician.  This stuff makes a mess, you definitly have to have it in an area that its ok that it gets on everything in sight.  I also feel the tanning solutions I have gotten for the spray gone have had a strong odor.  Even the following day after a shower, I can still smell the spray on my skin.  Its not a horrible smell, its just one I dont particularly want to smell like.

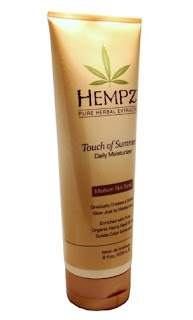
I've tried the Loreal Sublime line in the different types of lotions and even the cloths.  As well as Hempz and many other brands.  They all had a negative somewhere in there. 


But this year, I have found my new love.  Its a tanning spray by Fake and Bake that you can find at Ulta.  It has very minimal scent.  It gives a great tan color that doesn't look orange or fake at all.  Its a much prettier brown than this redhead tans for sure!  Its a little pricey but Ulta often does coupons and sales.  I got mine on sale but would definitly pay full price for it. You spray the solution on to a mitt and apply in a circular motion.  Its colored so you can see where you are putting it, its super light weight, doesn't go on super dark so you can build up to the tone you want and dries very quickly.  Its not streaky or blotchy and its super fast to apply.  The only negative I have at all is that its hard to apply to your own back but that's not enough to keep me away!!  If you need a self tanning product for the spring and summer, I highly recommed you give this one a try! 


AND, if you've made it with me this far, its your lucky day!  Today is my birthday so I'm going to be doing a giveaway! You have until Saturday at 5:00 pm EST to enter.  You do not have to live locally, I will be happy to mail out a prize to you if you are the winner!  It will either be one of my favorite eyeshadows or lipsticks or something fun like that!  To enter, leave a comment on this post about a beauty product you would like me to review, like my post sharing this on Facebook or share this post on your Facebook or Twitter (you will need to show me where you have done this).  You may enter all 4 ways in order to get 4 chances to win.  This contest will have one winner but next week when I review my all time favorite little Etsy shops, you will have several chances to win!

Friday, March 29, 2013

Special Event Hair and Makeup

Back in the fall, I did hair and makeup for Elise and Lindsea for their Homecoming Dance.  I had such a great time with these beautiful ladies!  They were so fun and easy to work with!  I never posted pics so here are a couple:


I absolutely love doing special event makeup and hair!  If you would like to set up an appointment for upcoming proms or weddings, email me, leave a comment or shoot me a message on Facebook!

Tuesday, March 26, 2013

And we're back...

So, it's been a while!  A lot going on on the home front with AAU, surgery & a broken hand for Bryce but it's time to get this back up & running in time for prom & wedding season!

Even though the blog has been on the back burner, I've been working on some exciting giveaways & fun things for the next few weeks!  I'm really excited to feature these products & give you guys a chance to try some of them too!

Today, I'll leave you with pics of my little salon set up at home.  I'm taking appointments for prom & wedding makeup/hair.  Shoot me a text or message to schedule a time!


Tuesday, October 30, 2012

At home acrylic nails

Hi guys!  I'm slightly OCD about my nails lol  I would dare to say my husband and son are the only 2 people in the last 7 years to see me without my nails done (and that would only be for a day at most) Once my son was no longer in diapers, I started using the Kiss and Revlon glue on artificial nails.


They were my every day nails for about 5 years.  I love the polished look of a french manicure and I liked the length these gave me.  At $7 a pack, they were more economical than having my nails done at the salon.  Everyone thought I had them done professionally and would ask who did them.  The thing I didn't like about them is they would start popping off after a little over a week and I would lose one at the worst times.  I also could never get the seal quite right around the perimeter and would have a teeny bit of water leakage underneath.

So, I took the plunge and got in to the world of gel polish aka Shellac & Gellish.  Gel polish is awesome.  The finish wears like artificial nails, as in it does not scratch, chip or peel like normal polishes.  My nails are very flimsy and gel polish would make them firm and durable.  I would change polish because of nail growth rather than chips, etc.  I used this for about 2 years and although I do love it, I miss my nail extensions.  My nails would get fairly long with gel polish but not the length I really like.

I started looking online and researching doing acrylic or gel overlays with tips at home.  I found several options I want to try but today, I got the
Kiss Lightening Speed Salon Dip Powder Manicure Kit.  I chose to try this one first because you do not have to have a UV lamp to use this kit.  I have a UV lamp from doing the gel polish but I dont think that's something the average Joe has on hand so I was trying to find a kit that everyone could use.  At Walgreens this kit was $14.99 regular price.

This is what it looks like:


And this is what you get:


  • Activator spray .64 oz
  • Brush-on gel .25 oz
  • Acrylic dip powder .26 oz
  • Gel activator spray nozzle
  • White buffing block
  • Nail file
  • Manicure stick
  • 24 white tips
  • 20 natural tips
To start, you push your cuticles back, cut/file your natural nails pretty short and make sure they are clean of dust from filing. This is what mine looked like (see why I have to have my nails done? lol) :


Next, you match up the tips you want to use.  I chose the white tips.  You hold them up to your natural nail to see which ones fit width wise.  If they are too large, you file the sides down until they fit.  My first beef with this kit was I had to file almost every nail, none of them matched.  Once you have the nails filed to size and ready to go, you take the brush on gel and paint a thin little line on the bottom on the tip.  Then you press it on your natural fingernail for a few seconds until it has dried.  Continue until all fingers on one hand have tips.  Then, you cut and file the tips to your desired length.  You also want to buff the line where the tip meets your natural nail just a little bit so it will blend in nicely.  This is what mine looked liked after I had cut and filed.


Then the fun starts.  You take the brush on gel and apply a thin, even coat to your thumb nail, then you dip your thumb in the acrylic powder, shake the excess powder off.  Repeat on your remaining fingers until they all have acrylic powder on them.  Then you brush the gel back on your thumb nail, on top on the powder.  The mess begins now.  After you do this, the gel and powder start to harden - you are instructed to wipe your brush before dipping it back in the gel to move on to the next finger.  My brush immediately started stiffening.  As I completed the 2nd layer of gel on that hand, the end of the brush was hard as a brick making it nearly impossible to evenly coat the nails.  After this step,  you spray on the activator spray on your nail and then buff your them with the provided white buffing block.  At this point, I was annoyed with the brush but pretty happy with the results.  I put a coat of clear polish on top to make them nice and shiny.  Here is what they looked like after the clear coat:


From a distance, I think they look great.  Up close, I see lots of imperfections.  The second hand was a million times harder to do with the brush being nearly impossible to use.  I was even dipping it in pure acetone between dips back in to the bottle and it was still a huge mess. 

Overall, for $15, its a good looking artificial nail.  The tips are well attached and feel very secure.  The smooth gel coat over top gives a really professional nail look.  If you can paint your own nails, you can do this kit.  Even with the trouble I had on the second hand, it looks good and no one just glancing at your nails would see the imperfections.  Although there are still tips, activator spray and acrylic powder left to do another set of nails, the brush on gel is cashed in.  Will this be my new go to?  Probably not.  I'm going to try some other gel and acrylic overlay products in hopes to find one I like better.  I'll update and let you know how long these last.  If you have any at home products that you love or any that you would like to know how they work, let me know and I'll try them out!


Thursday, October 18, 2012

Ah, Teal

Hi!!  Sooo, I'm seriously in love with the color Teal these days.  I dont have a ton of clothing that color so when I do wear it, my eyes are all out lol  I snapped these pics really quickly this morning and didn't do a tutorial but if anyone is interested, just give me a shout and I'm happy to do one.


Products used:

Starry Eyes Serum as the primer on my upper lid, under my brow

Black Primer on my lower lid - under the teal becuase the color I had was slightly lighter than what matched my shirt :)  It is not currently listed on the site I purchased from but if you are interested email me and I will direct you to another company

Foiling medium  - I dipped my brushes in this (just a teeny bit) before I dipped them in the loose shadow to make the shadow more vibrant and metallic.  Foiling medium is cool stuff and you can do a lot with it. (such as make shadows eyeliners)

Grafitti Eyeshadow - teal on my lower lid and to line my lower lash line

Sleigh Bells - as my outter v and crease blending to my upper lid (not nearly as bright silvery in person as the pic on the website of the product)

Cotton - under my brow as a highlight and in the inside corner of my eye to brighten

Black Liquid Liner on my upper lash line

Black Mascara - upper and lower lases


Monday, October 15, 2012

Question

Hi guys! I have some cool things planned to show you soon, life has been crazy busy!  A quick planning ahead question for you...would any one be interested in purchasing small gift sets of some of my go to eye shadows if I put them together for Christmas?  Shoot me an email, text, FB message or reply on here if you might be interested.  Thanks!  Be back soon!

Monday, September 24, 2012

Carina Dolci and a coupon code!

First, thank you guys for the amazing support and volunteers!! You have truly made my heart smile!  Homecoming hair and makeup appointments (by non-family members lol) have already been booked - that's so much more than I could have imagined at this point!!  I am so excited and grateful!

In the last post, I told you to check out Etsy.  I hope you have browsed a little, its completely addicting, just like Pinterest but that's a whole 'nother blog post!

One of my favorite (and I have quite a few lol) cosmetic shops is Carina Dolci.  This shop led me to discover the power of eyeshadow primer. Their primer is called Starry Eyes Serum.  Its a super light weight, clear primer.  There are many varieties of primers on the market and I'll go in to some of the others later but this is my every day, go to primer.  Just like when painting a wall, primer for your eyes insures a properly prepped surface for smooth shadow application.  It makes your shade more vibrant, minimizes fallout (the pesky little flakes that end up on your cheek when you apply eyeshadow) and makes it last a lot longer.  There is nothing that irks me more (well, yes, I'm sure there is lol) than having great eyeshadow on in the morning only to check it later in the day to find its creased, faded or spread where I didn't want it to be.  Starry Eyes Serum is a little miracle in a bottle every day but especially on hot, humid or even rainy days when makeup tends to melt, run or smear!

This is what the bottle of serum looks like.  It has its own doe foot applicator and a little goes a long way!  I think the best way to describe what it feels like is kind of like if you squirted eye drops out and then applied them to your lids with your fingers.  Its a cool, slightly wet feeling but not over powering at all.  It doesn't run and dries quickly.  I actually do one eye at a time when applying makeup to insure getting the power out of the primer.  I will prime and do all of my shadow application on one eye and then do the other so it doesn't dry too much before I begin.  The serum also does not have a scent for those of you that are sensitive to fragrances.


I picked a light purple and dark purple shadow to swatch to show you the difference of primer vs no primer.  The light color is called Lollipop and the dark color is called Grape Pop Rocks.  Both colors have a smooth consistency with a pop of sparkle.  As you can see, they are loose pigments rather than pressed eyeshadows.  I had never used loose pigments before I discovered Etsy and now I rarely use pressed. 

Side note...I need to take pictures in natural light from now on - these taken in indoor lighting don't do the colors justice! Sorry!


I swatched both colors on the inside of my arm.  The left shows no primer and the right shows with primer.  Its especially noticeable with the darker color but also makes the lighter color stand out more and adhere better.  Starry Eyes Serum makes my shadow stay in place without creasing from the time I put it on in the morning until time to go to bed.  Its crazy how fresh this makes eye makeup look all day!


This is one of those simple "duh" things for me.  When I tried it and thought of putting makeup on my face like paint on a wall, priming just makes sense!  For those of you (and I know you are out there lol) grimmacing at the thought applying colorful, bold, dark shades, we are going to ease in to it and go over techniques that will allow you to apply with confidence and make them as bold or subtle as you are comfortable with.  Both of the shades above are totally wearable shades for anyone!  Some of you see me often in person and know that my face varies greatly depending on my mood and the color palette I've chosen for the day.  If the way I sometimes wear my eyeshadow is too bold or colorful for you, don't worry, we will go over how to make it work for you!

Carina Dolci is a fabulous shop all around.  The shadows are great quality.  They are smooth and the shimmery pigments do not have large glitters in them like some other brands do. They are teeny, tiny flecks of sparkle that don't over power but they truly do brighten up your face.  The primer is a must have for me now.  I am on my second bottle and highly recommed it. If I have to pack an overnight bag for a trip, you can guarantee this is in it!

The fabulous owner of Carina Dolci is such a complete sweetheart!  She truly cares about making her customers happy and producing a quality product.  She has a lot on her plate right now so her turnaround time is slightly longer than normal but I promise you it is worth the wait!  Her packaging is adorable - the shadows come wrapped like little pieces of hard candy and that's got to make you smile when you open it! 

A huge thank you to Carina Dolci for offering a 10% off coupon code for you guys to use!  Just put in LEEELLEN12 in the promo code box at checkout and your discount will be applied!  Go show some love and treat yourself to something new!

P.S. If you are new to Etsy, the checkout is very similar to Ebay's buy it now.  It directly links to Paypal.  Super easy and fast!

At home this week, we've been working hard on making a little area of the house into a functional space for makeup and hair.  Its not 100% complete, I'm still looking for "the right" storage containers and decorations but I'm super excited about it and will probably give you guys a little sneak peek this week ;) 

Stay tuned!